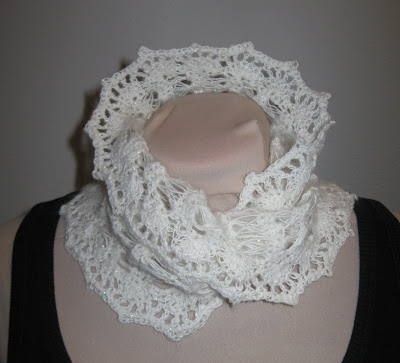
Yapım tarifi içeride...
I used an "E" hook and a size 15 knitting needle for the broomstick lace portion. Size up or down the hook and needle to suit your yarn or personal taste.
The Base Pattern:
1. With your chosen hook chain a multiple of four as long as you want your cowl to be high on your neck. I started with a base chain of 32, but with such a thin and drapey yarn I could have doubled that amount to 64 for a thicker and warmer cowl. As it is I probably used around 100 yds for the cowl with the 32 base chain. Add one extra chain for a turning chain. (33 ch)
2. Sc in each stitch across. Do not turn. (32 sc)
3. Pull up one loop from each sc and slide it onto your knitting needle, trying not to twist the loop. Continue across the row to the end picking up one loop for every stitch. Do not turn. (32 loops)
4. Slide the loops off your knitting needle and pick up the first four loops with your crochet hook. Sc 4 times into the first group of loops. *Pick up the next four loops and 4 sc in the group.** Repeat from * to ** to end of row. Ch 1, turn. (32 sc in 9 grouped loops)
5. Sc in each stitch across. (32 sc)
6. Repeat rows 3-5 until cowl's length is just long enough to fit over your head when ends are held together.
7. Twist one end of the cowl once to create moibus loop and sl st ends together. Do not fasten off.
Edging:
1. Turn work so you are working on the edge of the moibus loop. Ch 1 and sc once in end of sc row. 3 sc in one strand of each broomstick loop and 1 sc in each of the ends of the 2 sc rows across to end. The beauty of a moibus loop is that you get both sides of the cowl in one row. Sl st in turning chain. Ch 1. Do not turn.
2. Sc in first sc. *Skip 2 sc. 7 dc in next sc. Skip 2 sc. Sc in next sc.** Repeat from * to ** to end. (You may have to fudge a bit to get this to turn out correctly.) Sl st in turning chain. Do not turn.
3. Sl st in first 3 dc. Ch 4. (Dc in next dc, ch 1) twice. *2 dctog (next dc and 2nd dc of next shell.) Ch 1. (dc in next dc, ch 1) three times.** Repeat from * to ** until last shell. End with 2 dctog, ch 1. Sl st in 3rd chain of turning chain. Ch 1. Do not turn.
4. Sc in each 2dctog, dc and ch 1 space across the piece. At the apex of each shell (the middle most dc in each shell) sc in dc, ch 3, sl st in dc to create a picot. Sc in all other stitches and picot in each shell's apex to end. Sl st in turning chain. End off and weave in ends.
Hopefully my pattern is comprehensible enough. Enjoy!
Buradan buldum.
Hiç yorum yok:
Yorum Gönder