

Anlatım için içeri buyrun...
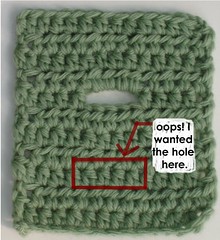
Step one: Locate where you want your buttonhole or pocket to be. In my swatch, I'm showing that the hole is a few rows too high.
Step two: Join a new yarn to the stitch right before where you want to start your hole. Make sure you are looking at the front of the stitch.
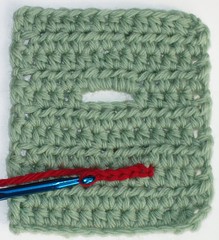
Step three: Chain as many stitches as you need for your hole. In this case, I am chaining 4 to make a 4 stitch buttonhole.
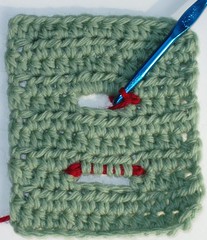
Step four: Slip your last loop off the hook
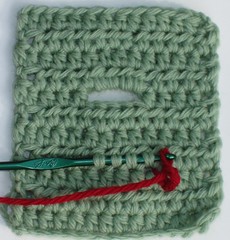 Step five: Using a smaller hook, insert hook (from left to right) into the bottom of ea stitch you want to go on your chain. In my case I want 4. Re-hook the last loop of the chain.
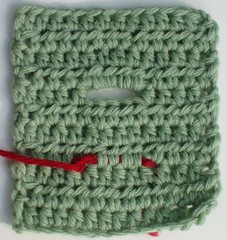 Step six: Pull loop through stitches. SL to the stitch at opposite end of the buttonhole. In this case its the fifth stitch from where I started. Fasten Off
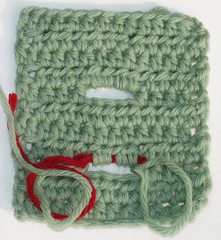 Step Seven: SCARY PART! Cut the middle stitch of the stitches under your chain, the ones you want to get rid off. Unwind the stitches to the ends of the buttonhole.
Step Eight: Fasten off yarn at either end. Weave in all your ends and you got yourself a new buttonhole!
Hey but what do I do about that hole up there?
 Step 1: Join new yarn to stitch at opening end of hole. Take loop off of hook.
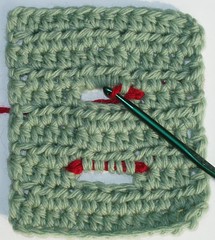 Step 2: Using a smaller hook, insert hook through the bottom of first stitch on chain, again left to right. Re-hook loop, pull loop through.
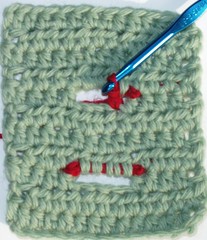 Step 3: Perform stitch as normal. In my case, I just did one hdc. Take last loop off of hook.
 Step 4: Using a smaller hook, insert hook through the bottom of the next stitch on the chain. Re-hook loop, pull loop through.
Repeat steps 3-4 to the opposite end of the hole.
 Step 5: SL working loop to stitch at the opposite end. Fasten Off.
 Step 6: Optional- Cut chain in the middle. Unwind yarn to the ends of the hole. (you can leave it there too- if its not that noticeable)
 Step 7: Fasten off, and weave in all ends.
TA-DA! You just moved your buttonhole. Pretty cool, right?
Harika deği mi?
Burada gördüm..
Hiç yorum yok:
Yorum Gönder